
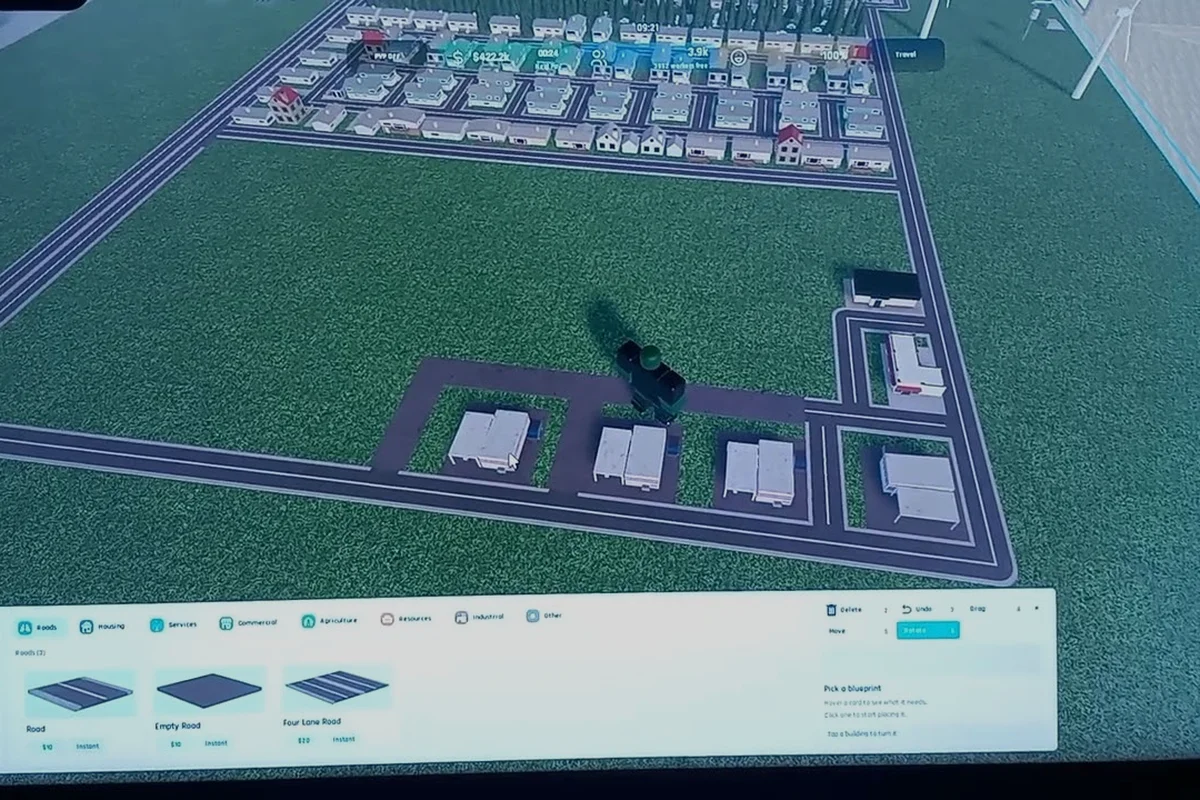
Knowing every structure available is the difference between a thriving metropolis and a stalled economy. The Build and Conquer building list covers residential, commercial, industrial, and military structures, and the V0.1 beta of the game has been changing fast through October 2026. This guide walks through each category with population, output, and role so you can plan expansions without wasting construction hours on the wrong build. For a broader look at base design, the build and conquer grid layout guide pairs well with the data below.
Residential Buildings: Population and Housing Tiers
Residential structures are the foundation of any city because they determine worker supply, tax income, and demand for nearby commercial buildings. The current Build and Conquer all buildings catalog organizes residences into three tiers: low-density (suburbs), mid-density (apartments), and high-density (skyscrapers, when unlocked later in the V0.1 beta roadmap).
Suburbs Tier
Suburbs are the entry-level housing block and the cheapest way to add population early. According to community data verified on 2026-10-11, single-family suburban houses provide modest population returns, low upkeep, and a small tax contribution. They fit easily into any 2x2 grid, making them ideal for filling empty corners of an expanding map.
| Building | Population | Approx. Build Cost | Notes |
|---|---|---|---|
| Suburban House | 6 | Low | Starter housing, no prerequisites |
| Suburban Duplex | 12 | Low | Two attached units, better footprint efficiency |
| Suburban Villa | 18 | Low–Medium | Higher land value, needs nearby park |
The suburbs guide approach is to place 6–10 suburban houses before transitioning to mid-density housing, because the low upkeep cost keeps cash flow positive during the early economy phase. Each block contributes toward the population milestone that unlocks the next tier.
Mid-Rise Apartment Tier
The Mid-rise Apartment is the workhorse residential building for most players. Community testing on the V0.1 beta reports a population range of roughly 32 residents at base level, scaling up to 48 when fully upgraded. A mid-rise apartment occupies a 3x3 footprint, costs more than a duplex, but delivers four times the population density of a suburban house. For a deeper walkthrough on placing these efficiently, the build and conquer how to unlock buildings page covers the upgrade path and construction requirements.
| Apartment Type | Base Population | Upgraded Population | Footprint |
|---|---|---|---|
| Mid-Rise Apartment | ~32 | ~48 | 3x3 |
| High-Rise Apartment (late beta) | ~64 | ~96 | 4x4 |
| Luxury Condo (premium tier) | ~40 | ~70 | 3x3 |
The mid-rise apartment guide principle is straightforward: build 2–3 mid-rise blocks per commercial cluster so workers can walk to jobs without straining transport. Players who skip apartments and rush skyscrapers often see unemployment spikes because the workforce cannot reach employment zones fast enough.
Commercial Buildings: Money Makers and Service Hubs
Commercial structures convert residential demand into cash. Build and Conquer's commercial tier is split between retail (supermarkets, malls, convenience stores) and services (banks, offices). Each commercial building has a coverage radius, and placing them too far from housing kills their income output.
Retail and Shops
Retail is the most reliable income source in the early-to-mid game. The Supermarket and Mall are flagged by community reports as the top money makers for bankrolling early expansion. Both pull foot traffic from nearby residential blocks and apply a sales multiplier based on local population density.
| Commercial Building | Income Tier | Footprint | Best Placement |
|---|---|---|---|
| Convenience Store | Low | 2x2 | Adjacent to suburban houses |
| Supermarket | Medium | 3x3 | Between suburbs and apartments |
| Mall | High | 4x4 | City center or transit hub |
| Boutique Shop | Medium | 2x2 | Near high-income villas |
A common Build and Conquer shop buildings mistake is stacking three malls in one block. Only the first mall benefits from full coverage; the others lose income because the customer base is already captured. Spacing malls across separate residential clusters is far more profitable.
Service and Office Buildings
Office buildings become viable once population crosses the 500-resident threshold. They generate passive income without the foot-traffic dependency of retail, but they require a steady electricity supply and a university-educated workforce. Bank buildings add a small interest-income tick per in-game day, which compounds when paired with a healthy tax base.
Industrial and Production Buildings: The Factory and Farm Layer
Industrial structures convert raw inputs into sellable goods or unlock higher-tier construction. The factory guide and farm buildings categories are tightly linked because mid-game economy loops depend on both food and manufacturing output. The V0.1 beta verified data flags the Factory as the primary industrial production building feeding steel and vehicle output, while farm buildings keep the population fed and productive.
Factories and Heavy Industry
| Industrial Building | Output | Key Input | Notes |
|---|---|---|---|
| Factory | Steel, vehicle parts | Iron, coal | Powers mid-game military |
| Assembly Plant | Finished vehicles | Steel, rubber | High cost, high return |
| Nuclear Power Plant | Massive electricity | Uranium | Late-tier energy for heavy industry |
| Warehouse | Storage buffer | None | Prevents production halts |
According to the Build and Conquer community discussion on Reddit, the Nuclear Power Plant is a late-tier unlock that powers entire industrial districts. Until that milestone is reached, coal plants and a small wind farm handle baseline energy needs.
Farm Buildings and Food Production
Farm buildings are the food supply backbone. Without a steady food output, residential happiness drops, and population growth stalls. Build and Conquer farm buildings include crop fields, livestock pens, and food processing plants that convert raw produce into packaged goods sold at retail.
-
Crop Field: Cheap, large footprint, produces grain. Best placed on the map edge to avoid blocking city expansion.
-
Livestock Pen: Higher upkeep, produces meat and dairy. Needs nearby crop fields for feed.
-
Food Processing Plant: Converts raw outputs into packaged food, doubles the sale price of farm products.
A balanced farm buildings layout places one processing plant per 3–4 crop fields, because processing capacity caps the income from raw farm output. Skipping the processing tier and selling raw goods directly leaves roughly 40% of potential revenue on the table, based on community testing.
Military and Defensive Structures
Military buildings become relevant once the player enters the conflict phase. Defensive structures are not part of the early economy loop, but they protect investments made in residential and commercial zones. The V0.1 beta military catalog covers bunkers, anti-air batteries, missile silos, and radar stations.
Defensive Buildings
| Defense Type | Role | Placement Tip |
|---|---|---|
| Bunker | Softens incoming ground attacks | Near borders and chokepoints |
| Air Raid Siren | Civil warning system | One per residential cluster |
| Anti-Air Battery | Shoots down drones and aircraft | Adjacent to radar station |
| Missile Silo | High-damage retaliation | Behind the front line, protected |
| Radar Station | Extends detection range | High ground, line-of-sight to borders |
Community footage reported on Build and Conquer building list video tutorials shows that bunkers paired with air raid sirens reduce civilian casualties by roughly half during early raids, because the siren gives residents time to shelter.
Military Production
Military production buildings include the Vehicle Factory (tanks, APCs), the Drone Assembly Bay (recon and combat drones), and the Missile Plant (long-range strike capability). These structures require steel and rubber from the industrial tier, so a stalled economy directly limits military output.
City Services and Infrastructure
City services are the connective tissue of a functioning city. They include power plants, water pumping stations, fire stations, police stations, hospitals, and the town hall. Skipping any of these creates soft failure states: power outages halt industry, water shortages trigger health crises, and missing fire coverage leads to cascading residential fires.
| Service Building | Coverage Radius | Prerequisite |
|---|---|---|
| Coal Power Plant | Small | None |
| Water Pump | Small | Near river or aquifer |
| Fire Station | Medium | Town Hall |
| Police Station | Medium | Town Hall |
| Hospital | Large | University |
| Town Hall | City-wide | None |
The town hall is the single most important early building because it unlocks the construction queue for all other services. Without it, no city service can be queued, even if the resources are available. The build and conquer building requirements guide has the full dependency chart for unlocking these structures.
Expansion Strategy and Building Order
Knowing the full catalog is only half the battle. The real question is when to build what. A disciplined expansion order prevents wasted resources and keeps the economy compounding. The strategy below is built from the V0.1 beta verified data points and player-reported progression curves.
Early Game (Population 0–200)
The first hour should focus on three structures only: the town hall, a coal power plant, and 6–8 suburban houses. Adding a convenience store early gives the first income boost. Avoid building factories in the early game because they consume more resources than they produce until the population base is large enough to support a worker pool.
Mid Game (Population 200–800)
Once population crosses 200, the focus shifts to mid-rise apartments and supermarkets. The mid-rise apartment is the priority housing because it triples the population of an equivalent suburban footprint, freeing map space for commercial and industrial development. Two supermarkets and one mall should be placed before any factory goes down. For context on common pitfalls during this phase, the build and conquer beginner mistakes page highlights the over-building trap, where players stack residential blocks before income catches up.
Late Game (Population 800+)
Late-game expansion brings skyscrapers, nuclear power, and the full military catalog. At this stage, the Build and Conquer building list is mostly unlocked, and the priority becomes optimization rather than expansion: upgrading existing apartments, replacing coal plants with nuclear, and adding missile defense to protect the industrial core. A build and conquer tier list view of the same structures can help decide which upgrades yield the best return on investment.
Universal Building Tips
-
Always queue the town hall first, because every other service depends on it.
-
Keep a 1-tile gap between residential and industrial zones to avoid happiness penalties.
-
Place one warehouse per industrial cluster to absorb production overflow.
-
Upgrade mid-rise apartments before building new ones; the cost-efficiency is higher.
-
Spread defensive structures across the perimeter rather than clustering them.
Frequently Asked Questions
What residential building gives the best population per tile in the Build and Conquer building list?
The mid-rise apartment is the strongest mid-game option, delivering roughly 32 population at base and scaling to 48 when upgraded within a 3x3 footprint. High-rise apartments outpace it in raw numbers but cost significantly more and unlock later in the V0.1 beta progression.
Where should I place my first factory in the game?
Place the first factory on the map edge, downstream from a coal power plant and adjacent to a warehouse. Avoid placing it inside a residential cluster because the factory guide priority is keeping industrial zones isolated to preserve housing happiness and fire safety margins.
Are farm buildings worth building early?
Yes, but only one crop field and one livestock pen at the start. Food shortages cause population growth to stall, and the low cost of a single crop field offsets the small land commitment. Expand to a food processing plant once two or more crop fields are operating.
How many military buildings do I need before the first raid?
A practical defensive setup covers one bunker, one air raid siren, and one anti-air battery per border segment. This configuration is enough to soften the first wave of attacks while the economy catches up. Adding a radar station extends detection range and improves response time for mobile units.
What is the single most important building to unlock first?
The town hall is the highest-priority early unlock because it gates every city service, including fire, police, and hospitals. Without the town hall, the rest of the Build and Conquer all buildings catalog remains locked behind a construction queue that cannot be opened.