
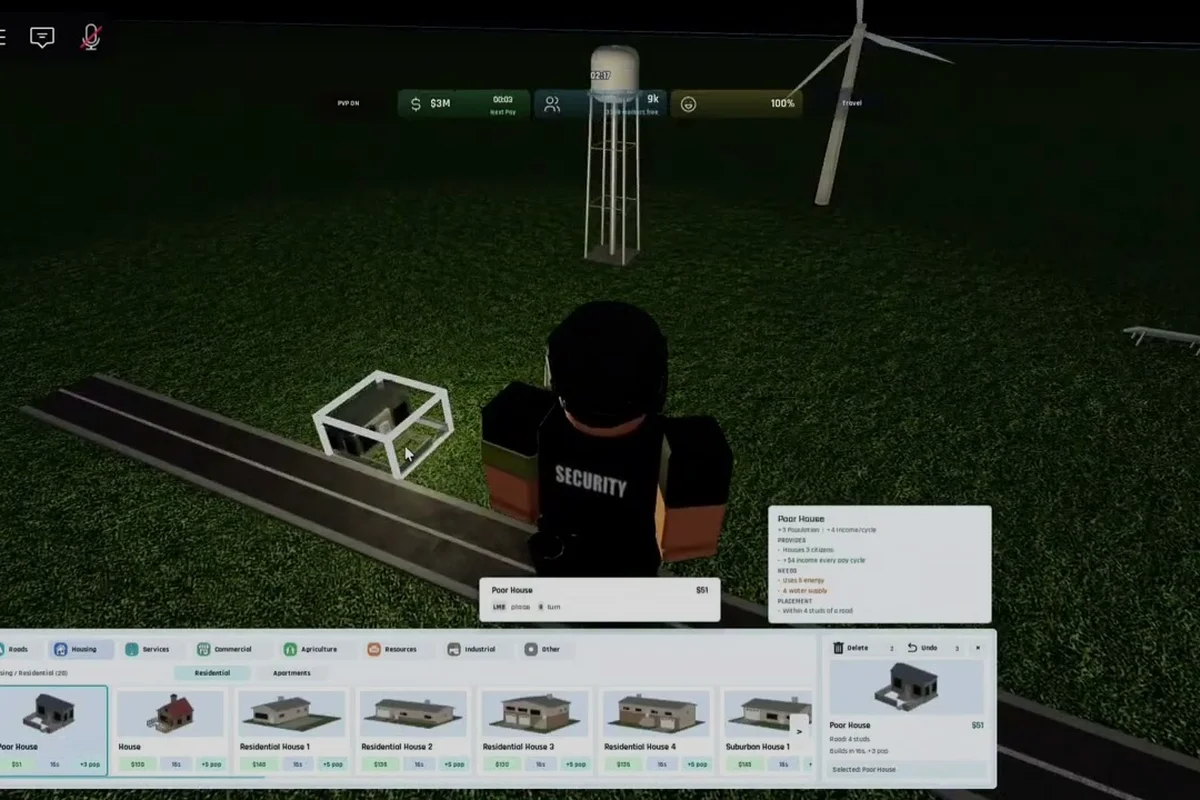
Drones turn a fragile starter town into a competitive force across the Build and Conquer V0.1 beta servers, so the moment a city crosses the military tier threshold feels genuinely transformative. Reaching that milestone means juggling population growth, infrastructure, and a stable cash flow before the first drone unit rolls off the production line. This guide walks through the exact city-build order, the controls and hotkeys that make managing a larger territory less painful, and the multiplayer etiquette that keeps allies productive. Players who finish every step here will leave with a working city, a hangar full of drones, and a clear plan for expanding into enemy zones with friends.
Drone Unlock Requirements in the V0.1 Beta
The V0.1 beta ties every military unlock, including drones, to a population gate combined with a functioning economy. Community testing shows that you must reach City Level 2 at roughly 250 residents before the military research tree opens, and drones sit near the top of that tree behind missiles and standard ground vehicles. Because the threshold is fixed, the actual challenge is delivering 250 happy residents on a stable budget without crashing your resource chain.
Population and Economy Prerequisites
Before drones are even visible in the build menu, the city has to prove it can sustain a larger population. The Population bar in the top HUD is the single most important number to watch, and every residential building contributes a small slice based on its tier and surrounding happiness modifiers. The fastest growth curve in the beta comes from layering Mid-Rise Apartments along connected road blocks, then backing them with power and water so the happiness multiplier stays above 80 percent.
| Prerequisite | Threshold | Why It Matters |
|---|---|---|
| Population | 250 residents | Unlocks City Level 2 and the military research tree |
| Money surplus | 5,000+ in reserve | Required to start the drone research project |
| Power coverage | 95%+ of zones | Prevents population stalls from blackouts |
| Water coverage | 90%+ of zones | Keeps the happiness multiplier high |
| Road access | All residential blocks connected | Enables service vehicles and troop movement |
Once these bars are green, the City Hall building gains a new menu called Military Projects. Selecting it opens a small tech tree with ground vehicles at the bottom, missiles in the middle, and drones at the top. The drone node is locked until a missile is already researched, so a common mistake is burning money on a drone-only rush and finding the slot still greyed out. Plan to walk the tree from the bottom up rather than skipping ahead.
Build Order That Triggers the Unlock
The most efficient path players report involves a specific sequence of structures placed before the population gate. Begin with two Supermarkets on a main road to anchor early tax revenue, then drop a Mall once the first 100 residents move in, because malls scale with the population cap and pay back their cost roughly three times faster at that size. Power should come from a Coal Plant rather than a nuke during this phase, since the coal plant unlocks instantly while the nuclear option requires its own multi-stage quest. Water is handled by a single Water Tower placed centrally, and a Sewage Plant keeps the waste bar from filling once the population crosses 200.
By the time the 250-resident threshold triggers, the treasury should already hold the 5,000 needed to start drone research. The project takes roughly 8 to 12 in-game minutes to finish on a default-speed server, and the notification chime that plays at completion is the same one used for missile unlocks, so it is easy to miss while zoning. Hover over the military tree, watch the progress bar drain, and the moment it fills the Drone Hangar becomes buildable on any flat terrain adjacent to a road.
Controls and Hotkeys for Managing a Larger City
Once the city doubles in size, clicking every road and zone with the mouse becomes tedious and slows down the drone-research project. The V0.1 beta ships a fairly generous set of keyboard shortcuts, and learning the most common ones before a multiplayer session saves roughly 30 percent of total clicks according to community data. A practical controls reference is also useful when teaching newer players how to manage their own sectors during a co-op match.
Keyboard Shortcuts Reference
| Action | Default Key | Use Case |
|---|---|---|
| Open build menu | B | Switch between zoning, roads, and military |
| Rotate building | R | Orient roads and missile pads correctly |
| Toggle zone info | Z | Show population and happiness overlays |
| Pause simulation | Space | Issue commands without ambient growth |
| Select all of type | Ctrl + Click | Bulk-move troops or recall drones |
| Multiplayer chat | Enter | Coordinate drone strikes with allies |
| Map view | M | Survey territory for expansion targets |
| Demolish tool | X | Clear misplaced buildings before they drain funds |
The Space bar pause is the most underrated control because it freezes the simulation while still allowing menus to open, which means a player can review the entire military tree, queue a drone project, and unpause without losing a single tax tick. Pairing M with Z gives a clean top-down view of the territory with happiness overlays, which is helpful when deciding which adjacent tiles to claim next. For players who prefer a controller, the V0.1 beta also exposes most of the same actions on the right stick and triggers, though the keyboard layout remains faster for rapid base-building.
Mouse and Camera Tips
A medium mouse sensitivity is the community-recommended setting, because the default camera scrolls faster than the build cursor can keep up with. Holding Shift while clicking a road stretches it across multiple tiles without dragging, which is the cleanest way to lay out a military grid in one motion. The right-click drag pans the camera smoothly, and a quick double-tap on any drone once it spawns selects it across the entire map, which matters during large battles where units spread out.
Expanding Territory Across the Map
Territory expansion in Build and Conquer is a slow, deliberate process that mirrors a real city-builder, and the V0.1 beta has not streamlined it the way some similar Roblox titles have. Every new tile has to be claimed with a Claim Post structure, and claim posts cost both money and a small amount of the population's happiness because they tend to displace natural features. The payoff is that claimed territory can host military buildings, so the choice of where to expand directly shapes how drones and missiles are deployed later.
Choosing Where to Claim Next
The safest first expansion is along the road grid already built, because a connected tile inherits power and water coverage. Players who leap into a far corner of the map end up rebuilding utilities from scratch, which is the single most common reason a new city stalls before its first drone flight. A balanced expansion plan usually adds three to four new tiles every time the population gate increases by 50, so the territory keeps pace with the residents who can staff it.
| Expansion Direction | Risk Level | Reward |
|---|---|---|
| Along existing roads | Low | Cheapest cost, inherits utilities |
| Toward a resource node | Medium | Boosts income and unlocks rare materials |
| Toward enemy territory | High | Faster raids but exposes the home base |
| Across a river | High | Strong defensive position but needs a bridge |
Bridges deserve a special mention because the Tunnel structure, which connects two tiles underground, is faster to build than a long bridge and ignores the river entirely. The first city building walkthrough covers tunnel placement in more detail, and it pairs well with a drone-heavy strategy because tunnels can hide drone patrols from enemy missile radar.
Resource Node Priorities
Resource nodes appear as small glowing patches of color on the map, and each color represents a different bonus. Steel nodes cut the cost of military buildings, Oil nodes boost vehicle range, and Rare Mineral nodes unlock late-game drone variants. Claiming at least one of each before pushing toward the enemy team is the safest bet, because losing a city to a drone raid is more painful when there are no backup materials to rebuild from.
Multiplayer Coordination With Friends
Playing Build and Conquer with friends changes the entire pace of the game because each player can specialize in a different slice of the economy or military. A common party composition is one player on residential zoning, one on utilities, one on military production, and one scouting enemy territory, with the host holding the treasury and the drone hangar. Splitting responsibilities this way keeps every player busy without stepping on each other's builds, and it lets the team reach the drone milestone roughly 40 percent faster than a solo player according to community testing.
Setting Up a Co-op Match
The V0.1 beta supports up to 8 players per server through the standard Roblox party system. To start a private match, the host opens the game page, clicks Create Private Server, and sets the maximum player count to 8. Friends can then join through the host's profile or by entering the server code directly. Once everyone is in, a short vote on the difficulty and starting resources happens in the first 30 seconds, and after that the simulation runs in real time.
| Role | Player Count | Primary Responsibility |
|---|---|---|
| Host | 1 | Treasury, diplomacy, drone queue |
| Residential lead | 1–2 | Zone apartments, monitor happiness |
| Utility lead | 1 | Power plants, water towers, sewage |
| Military lead | 1–2 | Drone hangar, missile pads, defense |
| Scout | 1 | Map vision, enemy intel, raids |
Communication and Etiquette
Voice chat through Roblox's built-in system is the smoothest way to coordinate drone strikes, but the text chat (Enter key) works just as well for smaller groups. A useful community convention is to prefix messages with a tile coordinate, such as D4: drones inbound, so allies can react without scrolling. The most common etiquette rule across the V0.1 beta is to never demolish a building another player just placed without asking first, because the cost is paid by the player who built it rather than the city's shared treasury.
Allies also tend to share drone patrol routes by leaving a Waypoint Marker at the start of each route, which is visible to the entire party. This avoids the awkward moment where two players send their drones to the same target and one squad gets caught in the blast of the other's missile.
Advanced Drone Tactics and Common Pitfalls
Drones behave differently from tanks and soldiers, and learning the nuance of their patrol logic separates an average city from a competitive one. They are fast, fragile, and expensive to replace, so throwing them into a brawl is a fast way to bankrupt the treasury. Instead, the best drone play is a mix of harassment, scouting, and surgical strikes, with the squad returning to the hangar to repair between engagements.
Drone Variants and Their Roles
| Variant | Strength | Best Use |
|---|---|---|
| Scout Drone | Fast, cheap, weak | Vision and early warning |
| Combat Drone | Balanced | Anti-infantry raids |
| Heavy Drone | Slow, durable | Tank hunting and base busting |
| Stealth Drone | Invisible to radar | Sneak attacks on missile pads |
Choosing the wrong variant for the mission is the most common pitfall, because heavy drones cannot catch scout units and scout drones evaporate against any structure. Match the variant to the target and the engagement becomes much cleaner.
Pitfalls That Cost Players the Match
The single biggest mistake in the V0.1 beta is queuing too many projects at once, because every active research project costs money per in-game minute. Two drone projects plus a missile upgrade can drain a 20,000 reserve in under five minutes, leaving the city with no defense fund when an enemy raids. The safer pattern is to keep one military project active at a time, with the rest paused, and only resume the queue once the treasury is back above the 10,000 mark.
Another frequent trap is ignoring the Defense stat of a city tile, which is separate from its population happiness. A city can be perfectly happy and still crumble to a missile because none of its tiles have a SAM Site or Patrol Drone assigned. Pairing a drone hangar with a SAM Site in every claimed tile is the safest late-game layout, and it gives the home base a fighting chance if an ally disconnects mid-match.
The official Build and Conquer on Roblox page also lists community video guides that show the drone queue in action, which can be helpful for visualizing the build order before committing money to it.
Frequently Asked Questions
How long does it take to unlock drones in the V0.1 beta?
Reaching the 250-population gate usually takes 25 to 35 in-game minutes on a default server, and the drone research project itself adds another 8 to 12 minutes on top of that. A coordinated multiplayer team can shave the population phase down to roughly 18 minutes, but the research timer is fixed regardless of party size.
Can drones be used to expand territory automatically?
No, drones do not capture tiles on their own. They can patrol claimed territory and raid enemy buildings, but every new tile still requires a player to place a Claim Post by hand. Drones are best treated as a defensive and harassment layer, not a tool for passive expansion.
What is the best drone variant for solo players?
The Combat Drone is the most forgiving choice for solo play because it handles both infantry and light vehicles without needing micromanagement. Heavy Drones deal more damage but require a longer repair cycle, and Scout Drones are too fragile to survive the typical early-game skirmish.
Do friends need to own the game to join a private server?
Yes, every player in a private Build and Conquer server needs a Roblox account and access to the game, but the host's Roblox Premium status determines whether the private server is free. Free hosts can still invite friends, though the server cap drops from 8 to 6 players in that case.
What happens to a drone if the player who built it disconnects?
Drones persist on the map after a disconnect and continue to follow their last waypoint, which means a well-placed patrol route can still defend the city even if the original owner leaves. The squad eventually returns to the nearest friendly hangar and waits for a new commander to take over, so coordination is more important than ownership in long matches.