
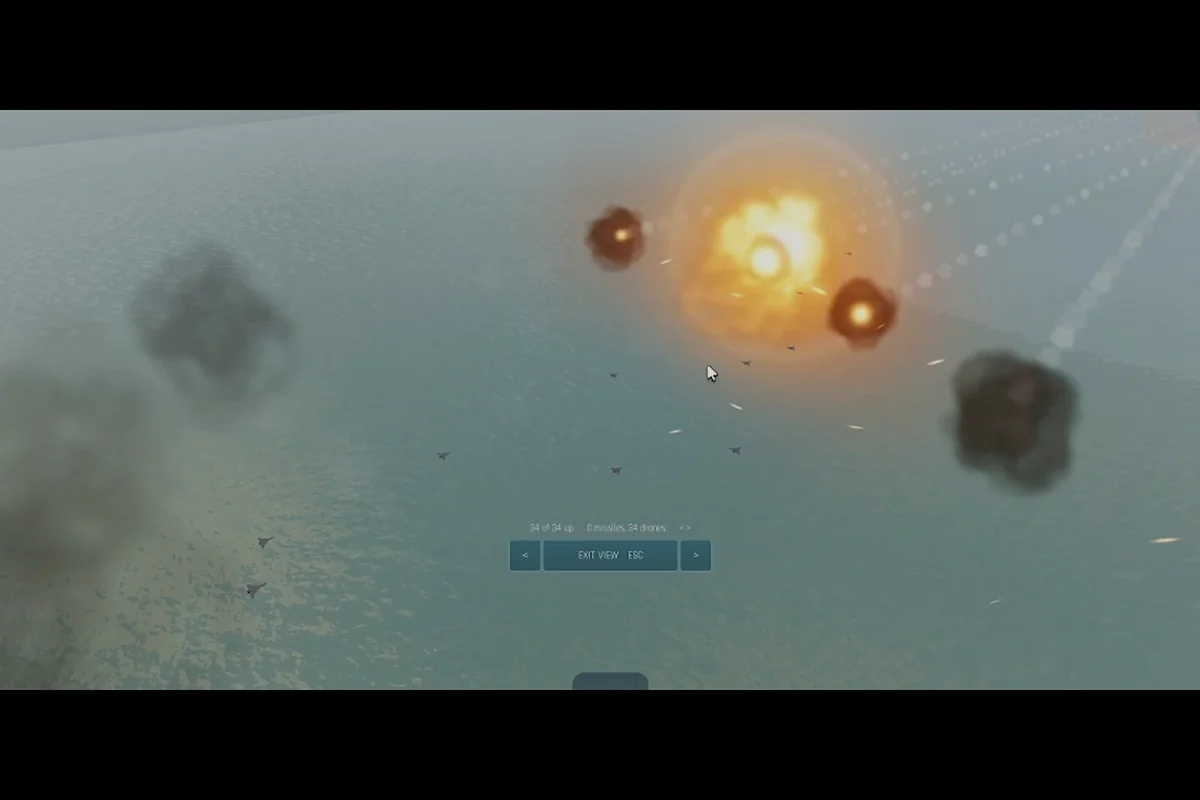
Air superiority in Build and Conquer decides whether your ground push stalls at the border or rolls through an enemy capital. This build and conquer air force guide breaks down the V0.1 beta air roster, production requirements, and timing windows that let you pressure cities before defenders can react. The key insight is that air units are not a late-game luxury; they are a mid-game force multiplier that punishes static defenses and slow infantry rotations. This makes air power especially decisive when paired with the expanded unit caps covered in our Build And Conquer Troop Limits guide, since larger air fleets can overwhelm point-defense systems before ground forces ever arrive.
Understanding the Air Force Production Chain
Before you can scramble fighters or launch drones, you need to understand how the military production pipeline works in the V0.1 beta. The Military Base serves as the production hub required before any vehicle or missile work can begin. Without this structure, your air force ambitions remain locked behind a hard progression gate that many new players overlook.
The production chain follows a strict sequence that rewards early infrastructure investment. First, you establish the Military Base as your primary production hub. Second, you unlock the specific air unit types through city progression and research paths. Third, you convert resources into squadrons rather than individual units. Community reports consistently emphasize that the eight guns per squadron conversion is the standard conversion rate, though unit costs are not published by the developer.
The following table outlines the verified production requirements based on the October 2026 beta state, consolidating data from developer announcements, patch notes, and multiple player reports into a single reference for your air force planning. Because the Military Base gate, the City level 2 Soldier Unlock, and the eight-guns-per-squadron conversion rate each sit at different points in the progression curve, treating them as one checklist rather than isolated steps helps you avoid the common trap of rushing drone deployment before your ground infrastructure can actually sustain squadron output.
| Production Stage | Requirement | Community Verification |
|---|---|---|
| Military Base | Required before any vehicle or missile work | Verified by developer announcements |
| Soldier Unlock | City level 2 | Confirmed by multiple player reports |
| Squadron Conversion | Eight guns per squadron | Community-reported, not officially published |
| Drone Deployment | Fast air option highlighted in recent updates | Verified in patch notes |
Because the beta changed often in October 2026, treat any number not listed above as unverified. The developer, The Slop Company, has kept unit costs unpublished, which means players rely on community testing to establish production benchmarks. This uncertainty makes early scouting and flexible build orders more valuable than rigid build orders copied from outdated guides.
Military Base Placement and Timing
The Military Base placement matters more than most players realize because it determines how quickly your air force reaches the front line. A base positioned near your forward operating zones reduces transit time for drones and fighters, while a base tucked behind your capital protects your production capacity from early raids.
According to community data, the optimal timing for your first Military Base falls between city level 2 and city level 3. This window aligns with the soldier unlock at city level 2, giving you a natural progression from infantry to vehicles to air units. Players who delay the Military Base until after city level 4 often find themselves out-produced by opponents who committed earlier to the production hub.
The trade-off is real: early Military Base investment means fewer resources for immediate infantry and armor production. However, the long-range artillery option, HIMARS, provides a bridge unit that lets you probe enemy movement while your air force comes online. This unit is not technically an air unit, but it serves a similar strategic role by punishing enemy repositioning from a safe distance.
Drone Tactics and Rush Timings
Drones represent the fastest air option highlighted in recent updates, and they have become the centerpiece of aggressive air force strategies in the V0.1 beta. Unlike heavier bombers or fighters, drones prioritize speed and harassment over raw damage output, which makes them ideal for probing enemy defenses and forcing reactionary movements.
The core drone rush timing revolves around the moment your Military Base completes its first production cycle. Because drones are the fastest air option, they can reach enemy territory before ground units finish their initial march. This creates a timing window where your opponent must choose between defending against drones or continuing their own production uninterrupted.
The following table compares drone rush timings against standard ground pushes, but the raw numbers only tell part of the story — the real advantage lies in how the Military Base production cycle interacts with your opponent's build order. A drone rush that hits during the enemy's first infantry training wave forces them to either cancel production or divert gun production queues toward anti-air, both of which delay their armor timing by at least one full cycle.
| Strategy | First Strike Window | Pressure Type | Counterplay |
|---|---|---|---|
| Drone Rush | Earliest possible | Harassment and scouting | Dedicated air defense placement |
| Tank Push | Mid-game | Direct territory pressure | Anti-armor infantry |
| HIMARS Probe | Late early-game | Long-range punishment | Counter-battery or fast units |
| Combined Arms | Mid-to-late game | Overwhelming multi-vector | Requires full defensive setup |
The drone rush is not a win condition by itself. Instead, it creates information asymmetry and forces your opponent to spend resources on air defense that they would otherwise invest in ground units. This economic pressure compounds over time, especially when you follow up the drone rush with a tank push that exploits the defensive gaps created by air defense spending.
Drone Micro and Positioning
Effective drone play requires more than just sending units forward. Positioning drones over enemy production zones reveals build orders and lets you target vulnerable infrastructure before it comes online. Because drones are fast, they can reposition quickly to avoid static defenses while still maintaining vision on key enemy movements.
Community footage from the V0.1 beta shows that experienced players use drones in pairs rather than solo. This pairing allows one drone to draw fire while the other completes its scouting or harassment mission. The tactic works because most early-game air defenses can only engage one target at a time, creating a window for the second drone to slip through.
The key limitation is drone fragility. Drones cannot absorb sustained fire, so they must retreat after taking the first hit. Players who overcommit drones to a losing engagement lose their air force early and spend the rest of the game playing catch-up. The discipline to pull back damaged drones is what separates effective air force commanders from players who waste their production capacity.
Fighter Squadrons and Bomber Unlock Paths
Fighter squadrons form the backbone of sustained air superiority in Build and Conquer. Unlike drones, which excel at harassment, fighters are designed to contest airspace and protect your ground units from enemy air attacks. The unlock path for fighters requires deeper investment in your military infrastructure, but the payoff is control over the skies.
The bomber unlock path represents the heaviest air investment available in the V0.1 beta. Bombers trade speed for devastating payload delivery, making them the natural follow-up to a successful drone rush or fighter screen. The progression from drones to fighters to bombers mirrors the overall escalation of military production, where each tier builds on the previous one.
The following table outlines the air unit roles and their strategic functions; note that HIMARS is included for completeness but occupies a distinct category—it fires from ground positions rather than flying, so it cannot be intercepted by enemy fighters the way drones or bombers can. This distinction matters when planning your production queue, because an opponent who invests heavily in anti-air defenses will shut down your true air units while leaving HIMARS free to punish their movement from behind your front line.
| Air Unit | Primary Role | Strengths | Weaknesses |
|---|---|---|---|
| Drones | Scouting and harassment | Fastest air option, cheap | Fragile, low damage |
| Fighters | Air superiority | Contests enemy air, protects ground | Requires production investment |
| Bombers | Payload delivery | High damage to structures | Slow, vulnerable to fighters |
| HIMARS | Long-range artillery | Punishes movement from safety | Not a true air unit, limited mobility |
The relationship between fighters and bombers is complementary rather than competitive. Fighters clear the airspace so bombers can reach their targets, while bombers destroy the ground defenses that threaten your fighters. Players who build only fighters struggle to convert air superiority into territory gains, while players who build only bombers lose their expensive units to enemy fighters.
Fighter Screen and Escort Tactics
A fighter screen is the defensive formation that protects your more valuable air units from interception. By positioning fighters between your bombers and the enemy air force, you create a buffer zone that forces enemy fighters to engage your screen before they can reach your bombers. This tactic works because fighters are more expendable than bombers in terms of production cost.
The escort tactic extends the fighter screen concept to offensive operations. When you send bombers against an enemy city, you escort them with fighters that engage any defending air units. This combined arms approach ensures that your bombers reach their targets even when the enemy has invested in air defense.
According to community reports, the most effective fighter-to-bomber ratio in the V0.1 beta is two fighters for every bomber. This ratio provides enough screening to absorb enemy fighter attacks while still maintaining a meaningful bomber payload. Players who skimp on fighter escorts lose bombers to interception, while players who over-invest in fighters lack the payload to finish off enemy structures.
Ground Units and Combined Arms Integration
Air power does not exist in a vacuum. The most effective air force strategies integrate with ground units to create multi-vector pressure that overwhelms enemy defenses. Understanding how air units complement the ground forces covered in a build and conquer ground units guide is essential for converting air superiority into territory gains.
Soldiers unlock at city level 2 and serve as the foundational infantry unit that holds territory while your air force operates overhead. Tanks form the core ground force for pushing enemy territory, creating the direct pressure that forces enemies to commit to defensive positions. When your air force strikes from above while tanks push from the front, the enemy faces an impossible defensive dilemma.
The combined arms approach requires careful timing coordination. Your air force should strike just before your ground units arrive, softening enemy defenses and forcing repositioning. Then your ground units push into the disrupted defenses while your air force transitions to intercepting enemy reinforcements. This sequence maximizes the value of both air and ground investments.
Infantry and Armor Support Roles
Infantry units in Build and Conquer serve a different purpose than in many strategy games. Rather than being the primary damage dealers, soldiers hold ground and provide vision that enables your air force to strike precisely. The build and conquer infantry guide covers these support roles in detail, but the key insight for air force commanders is that infantry creates the forward positions that extend your air force's effective range.
Armor units provide the breakthrough power that air units cannot deliver. While bombers can damage structures, tanks are required to actually capture territory and hold it against counterattacks. The armor guide emphasizes that tanks are the core ground force for pushing enemy territory, which means your air force should focus on enabling tank advances rather than trying to replace them.
The synergy between air and armor is particularly strong in the mid-game. When your tanks push into enemy territory, your air force can strike enemy anti-armor positions before they can engage your tanks. This protective umbrella allows your armor to advance further and faster than it could without air support.
Air Defense Counterplay and Counter-Counterplay
Every air force strategy has a counter, and understanding air defense placement is crucial for both attackers and defenders. The best air defense placement guide covers defensive positioning in detail, but air force commanders need to understand how to defeat these defenses rather than just build them.
The most common air defense mistake is clustering defenses around a single high-value target. While this protects that target, it leaves the rest of the base vulnerable to air strikes. Smart air force commanders probe for these defensive gaps and strike where the enemy is weakest rather than where they are strongest.
The following table outlines common air defense setups and how to defeat them: before committing your air force, send a single cheap scout aircraft or sacrificial fighter to map the enemy's defensive footprint — clustered setups reveal themselves when three or more anti-air turrets sit within overlapping range of one target, while spread defenses show isolated single turrets with dead zones between them. Identifying the pattern first determines whether you split your squadron for flanking runs or mass all bombers on one breakthrough point, because attacking the wrong setup wastes fuel and rebuild time on aircraft that never reach their drop zone.
| Defense Setup | Weakness | Air Force Counter |
|---|---|---|
| Clustered defenses | Leaves flanks exposed | Strike undefended flanks |
| Spread defenses | Individual positions weak | Concentrate force on one point |
| Forward defenses | Rear areas vulnerable | Deep strike behind the lines |
| Mobile defenses | Limited coverage area | Bait and reposition |
The counter-counterplay layer involves anticipating how your opponent will respond to your air force. If you know they will build air defenses, you can pre-position ground units to punish that investment. This strategic depth is what makes Build and Conquer air combat more interesting than simple unit spam.
Missile Integration and Cooldown Management
Missiles represent a complementary weapon system that shares production infrastructure with your air force. The missile cooldown mechanics covered in the missile guide apply to air-launched weapons as well, which means timing your missile strikes with your air force operations creates devastating combined attacks.
The key insight is that missiles and air units serve different timing windows. Missiles provide burst damage on cooldown, while air units provide sustained pressure over time. By alternating between missile strikes and air force operations, you maintain constant pressure on the enemy without overcommitting to any single attack vector.
Community testing suggests that the most effective pattern is missile strike first to soften defenses, followed by air force harassment to prevent repairs, followed by ground push to capture territory. This sequence exploits the cooldown mechanics while maximizing the value of each unit type.
Frequently Asked Questions
How do I unlock air units in Build and Conquer?
You need to build a Military Base first, which serves as the production hub required before any vehicle or missile work. Soldiers unlock at city level 2, and air units become available through subsequent progression. The exact unlock levels for fighters and bombers are not officially published, so community testing guides the current understanding.
Are drones worth building in the V0.1 beta?
Yes, drones are the fastest air option highlighted in recent updates and provide excellent scouting value. They are fragile and cannot win fights alone, but their speed lets you probe enemy defenses and force reactionary spending on air defense. Pair drones with ground units for maximum effectiveness.
What is the best air force composition?
The optimal composition depends on your strategy, but a balanced approach uses drones for scouting, fighters for air superiority, and bombers for structure damage. Community reports suggest a two-to-one fighter-to-bomber ratio works well for escort missions. Adjust based on what your opponent builds.
How does the eight guns per squadron conversion work?
Community reports indicate that eight guns convert into one squadron, though this is not officially published by the developer. The conversion happens automatically when you have enough guns stockpiled. Because unit costs are not published, treat this conversion rate as community-verified rather than official data.
Can air units capture territory?
No, air units cannot capture territory by themselves. You need ground units like tanks to actually push into enemy territory and hold it. Air units soften defenses and provide vision, but the territorial gains come from your ground forces. This is why combined arms strategies are essential for winning games.