
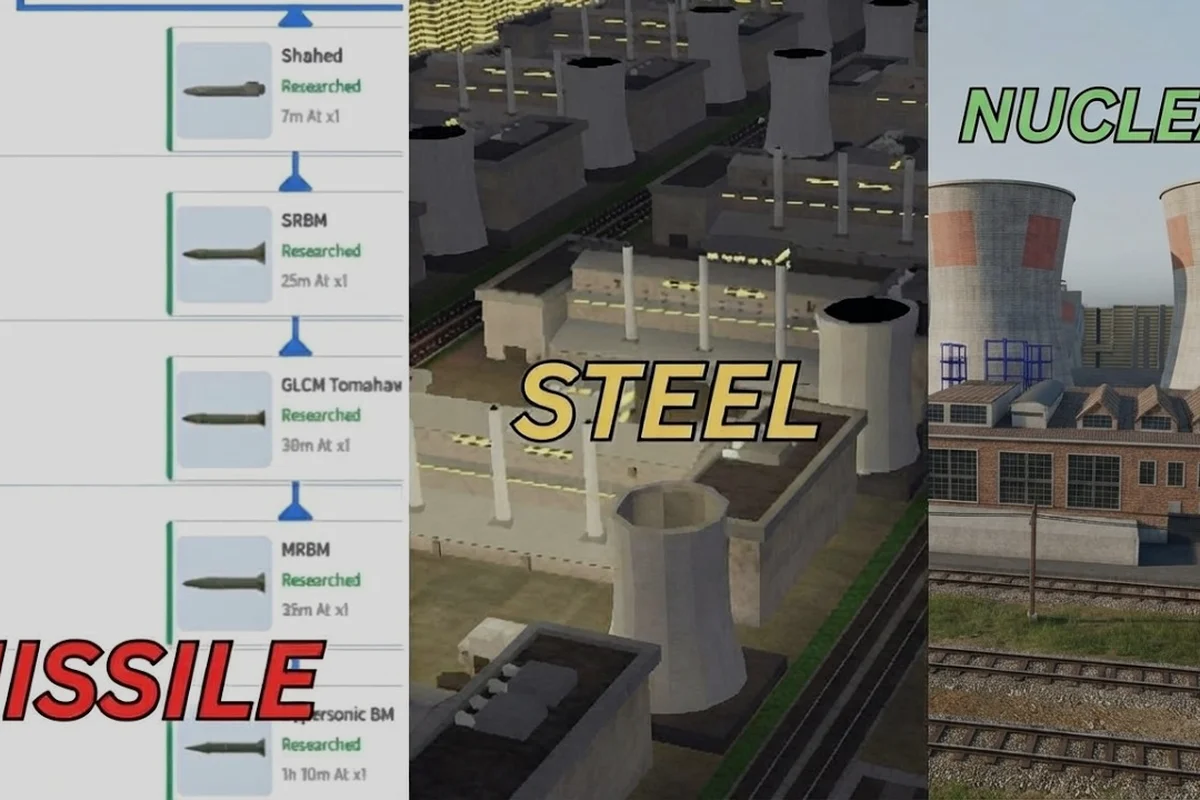
Understanding the effective missile launch range in Build and Conquer determines whether your strike lands before the enemy rebuilds or gets intercepted mid-flight. The V0.1 beta gives you four distinct missile classes, each with a different unlock position, flight profile, and interception risk, so choosing the wrong one wastes a full production cycle. This breakdown maps every verified launch range tier and the unlock order that gets you to Hypersonic BM fastest.
Missile Launch Range Tiers and Unlock Order
The Build and Conquer missile launch range ladder starts with the SRBM, which is the first missile you unlock at the military base after completing the initial ground-unit destruction quest. Because the beta launched on 2026-08-23 and has changed often through October 2026, the developer has not published exact damage, cooldown, or reload numbers, so range comparisons here rely on the verified unlock sequence and community footage from the V0.1 beta. The unlock order is creator-verified: SRBM first, then GLCM, then MRBM, and finally Hypersonic BM as the last step of the quest line.
The key distinction across the four classes is not just raw distance but how each missile travels. Short-range and medium-range ballistic missiles arc high and come down steeply, while ground-launched cruise missiles fly low and flat, which changes how anti-missile systems respond. The following table breaks down the verified progression and the general role each class fills in a strike plan.
| Missile Class | Unlock Position | Flight Profile | Interception Risk | Best Use Case |
|---|---|---|---|---|
| SRBM | First unlock | High ballistic arc | Moderate | Early base harassment |
| GLCM | Second unlock | Low terrain-hugging | Low against radar gaps | Sneak attacks on static defenses |
| MRBM | Third unlock | Medium ballistic arc | Moderate | Heavier mid-game strikes |
| Hypersonic BM | Final unlock | Extreme speed, high arc | Very low | Decisive late-game knockout |
Because the quest line gates every missile behind ground-unit or building destruction, you cannot simply research the longest-range option from the start. The missile silo you build early only supports the classes you have actually unlocked, so your first silo will fire SRBM rounds regardless of how much you invest in infrastructure.
How the Unlock Quest Actually Works
The missile unlock quest in Build and Conquer requires you to destroy enemy ground units or buildings to progress, which means passive base-building alone will never advance your missile tech. Community footage from the V0.1 beta shows that players who rush the first ground-unit kills unlock SRBM within the opening minutes, while those who turtle behind walls stall their missile progression entirely. The quest line then demands escalating destruction targets before it grants GLCM and the later classes.
This design creates a natural tension between building economy and unlocking strike capability. If you spend your first ten minutes on resource infrastructure, you will have a strong production base but zero missile options when an enemy pushes your border. Conversely, an early aggression player unlocks GLCM quickly but may lack the silo capacity to fire multiple rounds in sequence.
The practical takeaway is that missile unlocks are a parallel progression track, not a linear tech tree. You can keep destroying ground targets with conventional units while your silos produce, which lets you advance the quest line without pausing your economy. The full unlock path to Hypersonic BM is covered in the dedicated missile unlock guide, which maps every quest step and the destruction thresholds reported by players.
Which Missile to Unlock and Fire First
The question of which missile to unlock first in Build and Conquer has a clear answer for the V0.1 beta: you unlock SRBM first because the quest line forces it, but the real decision is which missile you prioritize firing once multiple classes are available. The GLCM is the strongest early pick for players who want to punish static defenses, because its low flight profile slips under radar gaps that ballistic arcs cannot avoid.
However, the SRBM remains valuable even after you unlock later classes because it is the cheapest and fastest to produce. A player who spams SRBM rounds can keep constant pressure on an enemy's outer buildings while saving MRBM or Hypersonic BM for the killing blow. The following table compares the strategic role of each class in an early-to-mid-game strike plan.
| Priority | Missile Class | Why Fire It First | When to Hold It |
|---|---|---|---|
| 1 | GLCM | Bypasses early radar gaps | When enemy has dense air defense |
| 2 | SRBM | Cheap, fast production cycle | When you need heavy damage per hit |
| 3 | MRBM | Stronger strike for mid-game | When silo capacity is still low |
| 4 | Hypersonic BM | Nearly uninterceptable | Until you can afford the production cost |
The Hypersonic BM is the final unlock and carries a very high chance to slip past anti-missile systems, according to community reports from the V0.1 beta. That makes it the best choice for a decisive strike on a heavily defended core base, but its production cost and unlock position mean you will not have it until the late game. Firing it early in a match is impossible, so the practical priority is to master GLCM and SRBM timing first.
Matching Missile to Target Type
Different target types reward different missile classes. Static defenses like turrets and radar installations are vulnerable to GLCM because the low flight path avoids the high-altitude detection envelope that ballistic missiles trigger. Ground units that cluster around a forward base are better hit with SRBM, since the steep descent catches them before they can scatter.
The MRBM fills the gap when you need heavier damage than SRBM but have not yet unlocked Hypersonic BM. Its medium ballistic arc is easier to intercept than a cruise missile, but the payload makes it worthwhile against medium-tier buildings. Community footage shows players using MRBM to crack open defensive walls before sending in ground units.
The Hypersonic BM is the only class that reliably hits a target protected by layered anti-missile systems. Because it travels at extreme speed, interception windows are tiny, which is why players save it for the enemy's most valuable structure. The official Build and Conquer game page confirms the strategy genre and 8-player server cap, which means you will face multiple opponents who may each field different missile defenses.
Missile Spam Strategy and Silo Management
A missile spam strategy in Build and Conquer works only if your silo count matches your production ambition. Because each silo fires one class at a time and production cycles are not published, the community approach is to build multiple silos and stagger their launches so that at least one missile is always in the air. This constant pressure forces the enemy to keep anti-missile systems active, which drains their resources even when your rounds miss.
The missile silo guide principle is simple: never rely on a single silo for a decisive strike. A solo silo firing SRBM rounds gives the enemy time to rebuild between impacts, while three silos firing staggered GLCM rounds create a near-continuous threat. The following table outlines a basic silo allocation plan for a mid-game missile spam setup.
| Silo Count | Recommended Loadout | Stagger Pattern | Pressure Level |
|---|---|---|---|
| 1 | SRBM only | Single shots on cooldown | Low |
| 2 | SRBM + GLCM | Alternate launches | Moderate |
| 3 | GLCM + GLCM + SRBM | Rotating 10-second gaps | High |
| 4+ | Add MRBM or Hypersonic BM | Reserve heavy for key targets | Extreme |
The weakness of missile spam is interception. A player who invests heavily in anti-missile systems can shoot down a large portion of SRBM and MRBM rounds, which is why the GLCM is so valuable in spam builds. Its low flight path means many early-game defenses simply do not detect it until impact.
Building a Silo Network That Survives
Silo placement matters as much as silo count. A cluster of silos in one corner is easy for an enemy to locate and destroy with a single MRBM strike, while silos spread across your territory force the enemy to split their targeting. Community reports suggest that players who spread silos behind natural terrain or inside tunnel networks keep their missile production alive far longer.
The city defense layout guide explains how to position silos so that anti-missile coverage overlaps without creating a single point of failure. Because tunnels are a core mechanic in Build and Conquer, you can hide silo entrances and move units between them without exposing the launch sites to direct fire.
A silo network also lets you fire different missile classes from different angles. A GLCM launched from a forward silo reaches its target faster than one launched from your rear base, which shortens the enemy's reaction window. This positional advantage is why experienced players build forward silos even before they unlock the later missile classes.
Counter Missile Tactics and Defense Layers
Counter missile tactics in Build and Conquer revolve around interception, not absorption. Because the V0.1 beta does not publish exact interception rates, the community approach is to layer multiple defense types and accept that some rounds will always get through. The goal is to stop the cheap SRBM spam and force the enemy to spend expensive Hypersonic BM rounds on targets you can afford to lose.
The most reliable counter is to build anti-missile systems that cover your entire base perimeter, not just the core. A gap in coverage is an open invitation for GLCM rounds, which exploit exactly those blind spots. The following table summarizes the defensive priorities against each missile class.
| Missile Class | Best Counter | Fallback Defense | Cost of Failure |
|---|---|---|---|
| SRBM | Perimeter anti-missile | Rebuild outer buildings | Low |
| GLCM | Low-altitude radar coverage | Spread critical buildings | Moderate |
| MRBM | Layered interceptors | Sacrifice decoy structures | High |
| Hypersonic BM | Accept the hit, rebuild | Keep core production mobile | Extreme |
The Hypersonic BM is the hardest to counter because its extreme speed gives interceptors almost no time to lock on. Community footage shows that even well-defended bases lose their most valuable structure to a well-timed hypersonic strike, which is why the best counter is not interception but redundancy. If your production is spread across multiple sites, losing one building does not end your match.
Reading Enemy Missile Habits
Experienced players learn to read enemy missile habits and pre-position defenses accordingly. An opponent who opens with SRBM spam is testing your perimeter, while one who saves for Hypersonic BM is planning a single decisive knockout. The missile guide covers how to identify these patterns from launch timing and silo placement.
Because every missile launch reveals the firing silo's location, you can counter-attack the silo network itself. A single MRBM round into an enemy's silo cluster can disable their entire spam strategy, which is often more efficient than shooting down individual missiles. This offensive counter is why silo placement and tunnel networks are so important for missile-heavy players.
The strategic missiles in Build and Conquer are not just weapons but information sources. Every launch tells you what the enemy has unlocked, where their production is, and what they are targeting. Players who treat missile defense as a passive shield miss the opportunity to turn each intercepted round into a counter-strike opening.
Strategic Missile Timing and Match Flow
Strategic missiles in Build and Conquer follow a clear match-flow pattern that separates early pressure from late-game knockout blows. The SRBM and GLCM dominate the opening phase because they unlock first and are cheap enough to fire repeatedly, while MRBM and Hypersonic BM define the mid-to-late game when bases are larger and defenses are denser. Understanding this flow lets you time your silo construction and unlock quest progression to match the phase you want to dominate.
The early phase rewards players who unlock GLCM quickly and use it to snipe static defenses before the enemy builds radar coverage. Because the quest line requires ground-unit destruction, you can combine conventional ground pushes with early missile strikes to accelerate both tracks at once. The following table maps the typical match phases and the missile class that defines each one.
| Match Phase | Dominant Missile | Strategic Goal | Key Risk |
|---|---|---|---|
| Opening (0-5 min) | SRBM | Harass outer buildings | Low damage per hit |
| Early-mid (5-12 min) | GLCM | Destroy static defenses | Radar coverage expansion |
| Mid-late (12-20 min) | MRBM | Crack walls and core structures | Interception layers |
| Late (20+ min) | Hypersonic BM | Decisive knockout | Production cost |
The transition from MRBM to Hypersonic BM is the most important timing decision in a match. Firing your first hypersonic round too early, before you have scouted the enemy's most valuable target, wastes a production cycle you cannot quickly replace. Waiting too long lets the enemy rebuild defenses or launch their own knockout strike first.
Coordinating Missiles with Ground Forces
Missiles work best when they support a ground push rather than replace it. A GLCM strike on an enemy's forward radar station opens a window for your ground units to advance without detection, while an SRBM barrage on a defensive wall creates a breach your infantry can exploit. The missile unlock quest guide explains how to sequence quest objectives so that missile unlocks and ground-unit production reinforce each other.
Because the unlock quest requires ground-unit or building destruction, you cannot progress missile tech without also developing a conventional army. This interdependence means a pure missile-spam strategy eventually stalls, since you need ground kills to unlock the later missile classes. The most successful players keep a balanced force and use missiles to amplify ground pressure at key moments.
The final phase of a match often comes down to who fires the first Hypersonic BM at the right target. If you have been saving your hypersonic round while the enemy spent theirs on a decoy, you hold the decisive advantage. That is why reading enemy habits and protecting your own silo network matters as much as raw missile count.
Frequently Asked Questions
What is the missile launch range order in Build and Conquer?
The missile launch range progression follows the unlock order: SRBM first, then GLCM, then MRBM, and finally Hypersonic BM. Each class has a different flight profile rather than a simple distance increase, with cruise missiles flying low and hypersonic rounds traveling at extreme speed.
Which missile should I unlock first in Build and Conquer?
You unlock SRBM first because the quest line forces it, but GLCM is the strongest early priority once available. Its low flight path bypasses early radar gaps, letting you destroy static defenses before the enemy builds full anti-missile coverage.
Does missile spam work in Build and Conquer?
Missile spam works if you build multiple silos and stagger launches so at least one round is always in the air. Relying on a single silo lets the enemy rebuild between impacts, while three or more silos firing GLCM and SRBM rounds create constant pressure that drains defensive resources.
How do I counter Hypersonic BM strikes?
The best counter to Hypersonic BM is redundancy, not interception. Because its extreme speed gives interceptors almost no time to lock on, you should spread production across multiple sites so losing one building does not end your match. Layered interceptors help against slower classes but rarely stop hypersonic rounds.
Do I need ground units to unlock missiles?
Yes, the missile unlock quest requires destroying enemy ground units or buildings to progress. This means you cannot advance missile tech with passive base-building alone, and a pure missile-spam strategy eventually stalls because you need ground kills to unlock the later classes.