
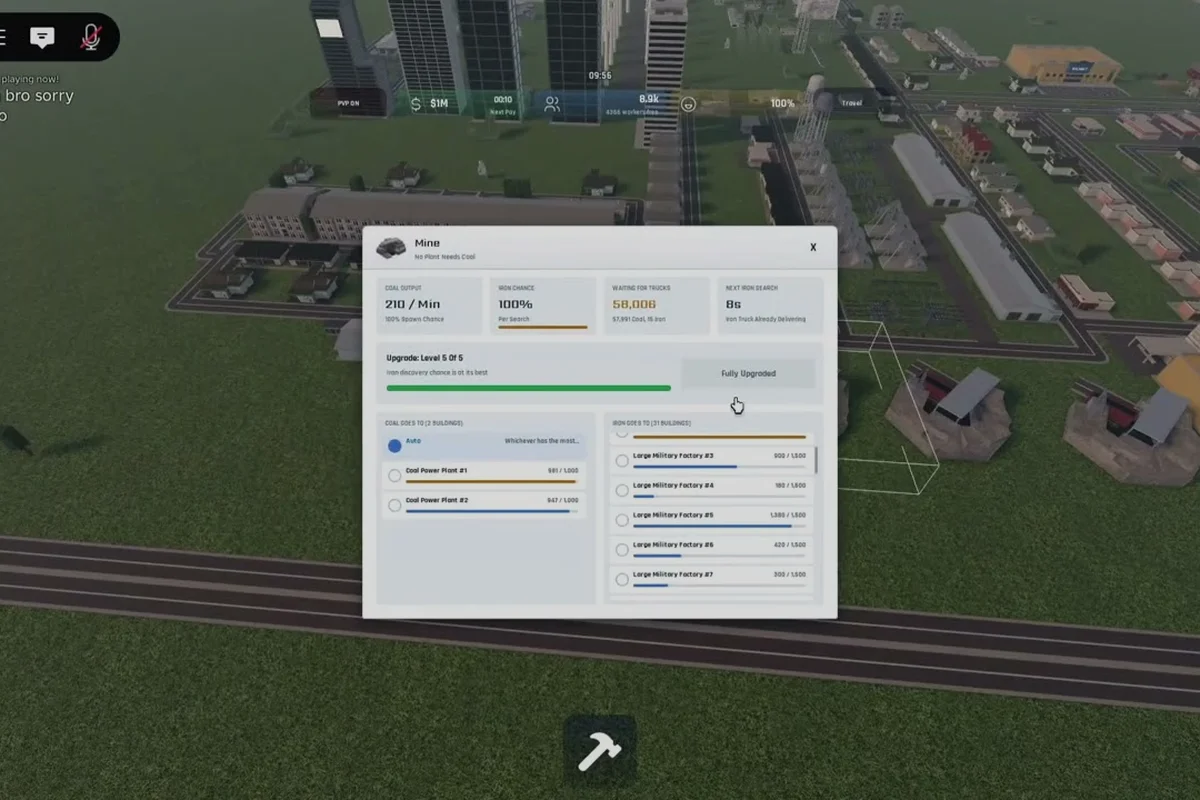
Iron is the backbone of every mid-to-late game factory in Build and Conquer, and learning how to get iron efficiently decides whether your base stalls or scales. The mineral itself is only useful once it passes through a smelter and becomes steel — the refined material that unlocks heavy industry, mechanized units, and military upgrades. If your conveyor lines are dry, the entire production pyramid grinds to a halt, which is why every seasoned commander treats iron as the first resource to secure after power and water.
The V0.1 beta (verified October 2026) keeps the iron chain in a familiar shape — gather from ore nodes, route to a smelter, convert to steel, then push into factories. According to community footage of the V0.1 beta, the acquisition loop for steel shifted in a recent update, so any chain you memorized in early access may now need a fresh pass. This guide restates the current loop in practical terms: where iron nodes spawn, how transport belts behave, what a smelter actually requires, and how to keep steel production fed even when power or fuel is tight.
Iron Node Locations and Field Survey Basics
Before you can pull iron off the map, you need to know where the nodes spawn and how to read them. Ore nodes are static, finite, and visually distinct — once you learn the silhouette, you will spot them at a glance while expanding the frontier. Treat the first hour of any match as a survey run rather than a building spree, because every ore patch you ignore now becomes a long belt later.
Reading the Map and Node Tiers
Every iron node displays a small ore-density color band that hints at the yield tier. Tier 1 patches are common and shallow, while Tier 3 patches are rare, deeper, and worth defending. A standard survey pass means walking the map edge-to-edge with a few workers and flagging each patch you find. The Build and Conquer on YouTube tutorial walkthrough confirms that most matches expose between six and twelve viable iron nodes depending on biome, with denser clusters near ridges and riverbeds.
| Node Tier | Visual Cue | Approx. Yield Multiplier | Recommended Workers |
|---|---|---|---|
| Tier 1 | Pale grey flecks | 1.0x | 2 |
| Tier 2 | Rust-brown banding | 1.4x | 3 |
| Tier 3 | Dark metallic shine | 1.9x | 4 |
A higher tier node does not cost more to claim, but it does benefit from extra workers, because each worker adds a small extraction bonus until the worker cap is reached. If you only have two workers free during early expansion, spend them on a Tier 3 node rather than spreading thin across three Tier 1 patches.
Claiming and Protecting Ore Patches
Once a node is spotted, drop an Ore Extractor directly on the deposit and connect it to your logistics grid with a conveyor belt. The extractor will not auto-claim — you need to assign at least one worker to keep it running. Patches that sit outside your power radius or beyond your defensive perimeter will frequently be raided, so a good rule of thumb is to build the smelter near the cluster, not near your capital. A deeper breakdown of the broader resource economy sits in the raw materials overview, which covers the same field-survey mindset applied to fuel, stone, and rare drops.
Routing Iron from Node to Smelter
Extraction is only half the problem. The second half is moving ore across the map without losing throughput to belt congestion, power brownouts, or worker shortages. Most iron shortages reported by players in the V0.1 beta trace back to a transport failure, not an empty node — the patch is full, but the conveyor cannot push fast enough.
Belt Layout and Throughput Tiers
Belt tiers determine how much ore reaches the smelter per minute. A Tier 1 belt saturates quickly once you connect two extractors, so the moment a second node comes online, upgrade at least one segment. According to community testing on the V0.1 beta, mixed-tier belts fall back to the lowest tier in the chain, which makes upgrading in islands a common mistake.
| Belt Tier | Ore / Minute | Best Use Case | Power Draw |
|---|---|---|---|
| Tier 1 | 30 | Single-node early game | Low |
| Tier 2 | 60 | Dual-extractor mid game | Medium |
| Tier 3 | 120 | Industrial clusters | High |
Avoid building long, snaking belts through enemy territory. A straight run from extractor to smelter not only performs better, it is also easier to defend with a few turrets or patrol routes. Whenever possible, place the smelter within two belt segments of the largest node in the cluster.
Belt and Merger Errors That Starve Extractors
The most frequent routing error is over-stacking mergers. Three extractors feeding into one Tier 2 belt will starve the furthest extractor of throughput, even if each individual node is healthy. The fix is a dedicated belt per extractor, with the merge happening as close to the smelter as possible. Another common trap is routing ore under a power line that frequently browns out — when the line drops, the belt stalls, the smelter idles, and your steel buffer empties before you notice. Build a backup power conduit for any belt that crosses more than three grid cells, especially in fog-of-war zones.
Players often ask how to keep production stable when iron farming pushes the frontier further from base, and the answer is almost always a second smelter near the new cluster rather than a longer belt back home. Splitting production at the source reduces the cost of every ore unit moved, which compounds as your base grows.
Smelting Iron into Steel
Raw iron on a belt is not yet useful. Every factory that matters — vehicle assembly, ammunition lines, advanced structures — consumes steel, not ore. Smelting is the conversion step, and it is where the V0.1 beta made its most visible change. The smelter still accepts raw iron, but the output ratio and worker assignment were rebalanced, so older ratios you may have read elsewhere are no longer accurate.
Smelter Setup and Worker Ratios
A basic smelter takes iron ore and outputs steel ingots at a fixed ratio. The conversion requires both power and assigned workers, and the smelter will not produce at full capacity until both are stable. The current V0.1 ratio holds at roughly two units of iron per one unit of steel, but the exact number drifts with hotfix patches — re-check the in-game tooltip before committing a long belt.
| Smelter Level | Iron Input / Min | Steel Output / Min | Workers Required | Power Draw |
|---|---|---|---|---|
| Basic | 40 | 20 | 3 | Medium |
| Improved | 80 | 44 | 5 | High |
| Industrial | 160 | 92 | 8 | Very High |
The ratio between workers and smelter level is not linear — an Industrial smelter wants eight workers, but assigning ten slows each worker's shift cycle, so more is not always better. Keep the worker count at the recommended value and resist the urge to over-staff.
Buffering Output Before the Factory
Steel ingots should never feed directly into a factory without a buffer chest in between. Smelters pulse output in batches, while factories draw at a steady rate, and the mismatch causes visible stutter at the factory door. A small buffer — even a single chest — smooths the line and keeps your assembly queue moving. For deeper coverage of the broader industrial chain, the industrial resources guide walks through the same buffer-first principle applied to advanced materials.
Power, Fuel, and Water Dependencies
Iron production does not exist in isolation. Every smelter and every Tier 3 belt draws power, every vehicle that defends the ore patch burns fuel, and every worker who runs the extractor needs water access. A failure in any one of these three resources halts the iron chain just as effectively as an empty node. Treat the smelter as the center of a small triangle of dependencies, not a standalone building.
Power Grid for Smelters
The V0.1 beta rebalanced grid output so that every new factory forces a small expansion of your power network. A basic smelter draws medium power continuously, which means a coal plant or a small generator array is enough for the first smelter — but the second one will brown out the line unless you add capacity. Community testing on the V0.1 beta suggests planning a dedicated power conduit for any smelter cluster rather than sharing a general-purpose grid. If you want a deeper treatment of generator placement, the power balance guide maps out a stable grid topology for mid-game bases.
| Smelter Setup | Minimum Power Source | Recommended Margin |
|---|---|---|
| 1 Basic | Coal Plant | +20% |
| 2 Basic or 1 Improved | Coal Plant + Generator | +30% |
| 1 Industrial | Nuclear or large array | +40% |
The margin column matters because power demand spikes during events and raids, and a tight grid that runs at 95% capacity will brown out exactly when you need it most. Build a buffer of at least 30% on any smelter line, and audit the grid weekly as new factories come online.
Fuel and Water for Workers and Vehicles
The vehicles that defend your ore routes consume fuel continuously, and the workers who operate extractors and smelters require water access within a reasonable radius. If either side of that equation fails, output drops even though the smelter itself is technically running. A common pattern in the V0.1 beta is to run a fuel depot near the ore cluster while keeping a water tower within three grid cells of the smelter. A complete walkthrough of fuel logistics sits in the fuel production guide, which covers refinery placement, truck routing, and the difference between vehicle-grade and generator-grade fuel.
Workers are the third dependency, and the bottleneck is rarely recruitment — it is housing. If your residential zone does not keep up with smelter staffing, output drops by a third or more. The worker management guide explains how to pace housing against industrial demand so the iron chain never starves for hands.
Steel Production Scaling and Optimization
Once a single smelter is running smoothly, the natural next step is to scale — a second smelter, a second ore cluster, and a real steel buffer feeding a vehicle factory. Scaling is where most V0.1 beta players hit their first wall, because each new smelter multiplies the demand on power, fuel, water, and workers at the same time. Treat scaling as a phased rollout rather than a single big build.
Phase 1: Stabilize the First Smelter
Before adding a second smelter, confirm the first one has been running at full capacity for at least ten minutes without brownouts, worker shortages, or belt stalls. Use this window to add a buffer chest, a small fuel reserve, and a defensive turret or two. Skipping this step is the single most common reason new players lose their first steel buffer to a raid.
Phase 2: Add a Second Smelter
Place the second smelter within belt range of the largest remaining node and route it to the same buffer chest. Power, fuel, and water demand roughly double with the second unit, so expand each supporting system in the same session — do not queue a smelter and walk away. According to community reports on the V0.1 beta, the most successful two-smelter setups run on a dedicated power line and a shared worker pool capped at twelve.
Phase 3: Push into Vehicle Assembly
With two stable smelters feeding a buffer, you can finally run a vehicle factory without starving the rest of the base. Vehicles consume both steel and fuel, so a good rule is to keep the steel buffer above fifty ingots before queuing anything heavy. Players often want to know how to keep steel production running through a war, and the answer is layered defenses around the buffer chest — a single artillery strike on an exposed buffer can wipe out twenty minutes of output.
| Phase | Smelters | Workers | Power Margin | Steel Buffer Target |
|---|---|---|---|---|
| 1 | 1 | 3-5 | 20% | 20 ingots |
| 2 | 2 | 8-12 | 30% | 50 ingots |
| 3 | 3+ | 15+ | 40% | 100+ ingots |
Optimization Habits That Compound
Three small habits separate stable iron economies from brittle ones. First, audit the belt network every time a new extractor comes online — a Tier 2 belt that worked for one node will stall for two. Second, keep a reserve of fuel near the front-line smelters so a logistics disruption does not pause the line. Third, retire exhausted ore nodes promptly. A Tier 1 patch that has been mined for forty minutes is no longer worth the worker assignment — move on to the next cluster and let the smelter run uninterrupted.
Frequently Asked Questions
Where do I find the most iron nodes in Build and Conquer?
Iron nodes cluster along ridges, riverbeds, and biome edges. Walking the map edge-to-edge with a few workers and flagging each patch is the fastest survey method. Tier 3 nodes appear as dark metallic patches and yield roughly 1.9x a basic node when fully staffed.
How do I turn iron into steel in the V0.1 beta?
Route extracted iron into a smelter via conveyor belt, assign the recommended number of workers, and confirm the building has stable power. The current conversion sits at roughly two iron per one steel, but the ratio changes with patches — always re-check the in-game tooltip before committing a long belt.
What is the best way to keep steel production running during a raid?
Defend the buffer chest with layered turrets, keep a fuel reserve near the smelter, and avoid placing the smelter at the end of a long, exposed belt. A mid-base smelter with dedicated power and a small guard post survives longer than a frontier smelter with no backup.
How many workers does an Industrial smelter need?
An Industrial smelter expects eight workers. Assigning more than ten slows shift rotations and reduces total output, so keep staffing at the recommended level rather than over-filling the building.
Can I run an iron chain without nuclear power in Build and Conquer?
Yes. A coal plant plus a small generator array supports two basic smelters comfortably, and three basic smelters if you keep the power margin above 30%. Nuclear power only becomes necessary once you push into Industrial smelters or vehicle assembly on a tight grid.