
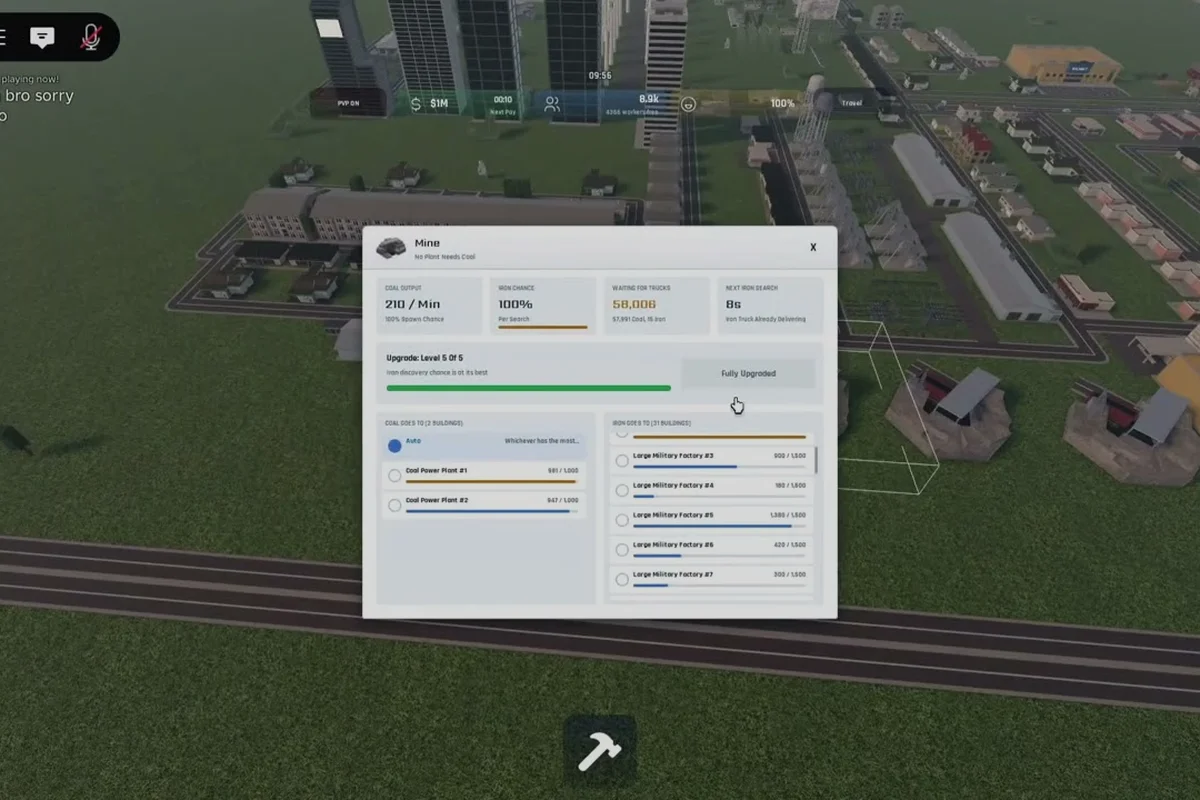
Steel production sits at the heart of every serious military economy in Build and Conquer, because refined metal unlocks heavy vehicles, mechanized warfare, and late-game structural upgrades that raw iron simply cannot support. This Build and Conquer steel factory guide walks through the complete iron-to-steel chain, the power grid requirements that make or break your output, and the storage buffers that prevent costly bottlenecks. Understanding how to produce steel efficiently separates a functioning war economy from a stalled one. Just as your blast furnaces and steel mills depend on a steady supply of raw ore, every vehicle and generator in that chain relies on the refining and distribution covered in our how to produce fuel guide, so balancing both flows keeps your war economy from grinding to a halt.
Understanding the Steel Production Chain
The journey from raw ore to refined steel involves multiple connected steps, and each link in the chain must operate at the right ratio to avoid waste. Community reports from the V0.1 beta consistently emphasize that steel acquisition changed in a recent update, so players should re-check their existing chains against the live build rather than relying on older footage or outdated tutorials. The core sequence remains stable: gather iron ore, transport it to processing, refine it into steel, and route the output toward heavy builds and vehicle production.
Iron Ore as the Foundation
Iron serves as the base ore gathered for industrial production, and without a steady inflow of iron, every downstream steel operation grinds to a halt. Players report that the most reliable early-game approach involves establishing multiple iron extraction points before committing to steel infrastructure, because the refining process consumes ore faster than new players typically anticipate. A single steel factory can drain an iron stockpile in minutes if the upstream gathering rate falls behind.
| Production Stage | Input Required | Output Produced | Key Bottleneck |
|---|---|---|---|
| Iron Extraction | Worker assignment | Raw iron ore | Gathering speed |
| Ore Transport | Logistics route | Delivered iron | Path distance |
| Steel Refining | Iron + power | Refined steel | Grid capacity |
| Heavy Build Supply | Steel + fuel | Vehicles/structures | Storage buffer |
The table above highlights a critical insight from community testing: the refining stage usually fails first, not because of iron shortages, but because players underestimate the power draw. When your steel factory stalls, check the grid before blaming your miners.
Why Steel Differs From Iron
Steel is a refined material needed for heavy builds and vehicles, while iron remains the raw input that feeds the entire industrial chain. This distinction matters because it changes how you think about storage and routing. Iron stockpiles can sit idle without penalty, but refined steel should flow continuously toward consumption points, since idle steel represents wasted power that already went into the refining process.
Managing Factory Power Demands
Power management is the single most common failure point in any Build and Conquer steel factory guide discussion, and for good reason. Grid output must scale with every new factory you bring online, which means adding a steel refinery without first expanding your generation capacity creates an immediate bottleneck that stalls every connected building. Players who treat power as an afterthought typically watch their entire production chain collapse the moment the refinery draws its first load.
Grid Scaling Fundamentals
The relationship between factory count and grid output is linear but unforgiving. Every new factory adds a fixed draw to your network, and if total generation falls short, the grid prioritizes residential zones over industrial consumers. This means your steel refinery might be the first building to lose power during a shortage, even if it is your most valuable asset.
| Grid Component | Function | Failure Symptom |
|---|---|---|
| Power Generation | Supplies total output | Brownout across network |
| Distribution Lines | Routes power to zones | Localized outages |
| Factory Draw | Consumes grid capacity | Stalled production |
| Residential Priority | Protected load | Industry loses power first |
Community data suggests that a safe margin is to keep at least 20 percent excess generation capacity above your total factory draw, because unexpected spikes from simultaneous refining cycles can push a borderline grid into failure. This buffer also gives you room to bring new production online without immediately crashing the network.
Sequencing Power and Production
The correct build order matters more than total capacity. Bring power generation online first, confirm stable output, and only then connect your steel refinery. Players who reverse this sequence often report cascading failures, because the initial power spike from a new factory can destabilize a grid that was already running near its limit. A stable grid absorbs the spike; an unstable one collapses under it.
Optimizing the Resource Production Chain
A Build and Conquer supply chain guide that ignores ratios will leave you with either idle factories or empty stockpiles. The goal is balance: every stage should operate at roughly the same throughput so that no single link becomes a permanent bottleneck. Community footage from the V0.1 beta shows that most players overbuild refining capacity while underbuilding iron extraction, creating a factory that spends most of its time waiting for ore.
Balancing Throughput Across Stages
Throughput balancing requires measuring each stage's output over time and adjusting worker assignments or building counts accordingly. If your iron miners produce 100 units per minute but your refinery consumes 150 units per minute, the refinery will idle for one-third of its runtime. That idle time represents wasted power and wasted infrastructure investment.
| Chain Stage | Common Overbuild | Common Underbuild | Balance Signal |
|---|---|---|---|
| Iron Extraction | Rarely overbuilt | Frequently underbuilt | Empty ore stockpile |
| Transport | Moderate overbuild | Rarely underbuilt | Clogged routes |
| Steel Refining | Frequently overbuilt | Rarely underbuilt | Idle factory cycles |
| Storage | Often overbuilt | Sometimes underbuilt | Overflow or starvation |
The balance signal column gives you a diagnostic tool: when you see an empty ore stockpile, the problem is upstream, not in your refinery. When the refinery idles, you have either too much refining capacity or too little incoming ore. Fix the actual bottleneck rather than adding capacity to an already-overbuilt stage.
Storage Buffers as Shock Absorbers
A proper Build and Conquer storage guide treats warehouses not as passive containers but as active shock absorbers that smooth out production fluctuations. Iron extraction varies based on worker efficiency and route congestion, while steel consumption spikes when you queue up a batch of heavy vehicles. Storage buffers absorb both variations, keeping your refinery fed during ore dips and your assembly lines supplied during consumption spikes.
Powering Heavy Builds and Vehicles
Steel's ultimate purpose is enabling heavy builds and vehicles, and the fuel that powers those vehicles represents a separate resource chain that intersects with steel production at the consumption point. Fuel is consumed by vehicles and mechanized warfare, which means your steel output must be matched by adequate fuel production if you want your heavy units to actually roll out rather than sit idle in the motor pool.
Coordinating Steel and Fuel Output
The intersection of steel and fuel creates a coordination challenge that many players overlook. Producing steel without fuel leaves you with vehicles that cannot move, while producing fuel without steel leaves you with nothing to build. Both chains must advance in parallel, and both draw on the same power grid, which compounds the management challenge.
| Resource | Primary Use | Secondary Use | Grid Impact |
|---|---|---|---|
| Steel | Heavy builds, vehicles | Structural upgrades | High draw |
| Fuel | Vehicle operation | Mechanized warfare | Moderate draw |
| Iron | Steel feedstock | Basic construction | Low draw |
| Water | Residential zones | Industrial cooling | Low draw |
This table underscores why a Build and Conquer energy guide is inseparable from steel production: every stage of the steel chain draws power, and the fuel chain that consumes your steel output draws additional power as well. Grid planning must account for both chains simultaneously.
Avoiding the Idle Factory Trap
An idle steel factory is worse than no factory at all, because it still draws standby power while producing nothing. Players who build a refinery before securing reliable iron input and stable power output end up paying a continuous cost for zero benefit. The fix is sequencing: secure inputs first, confirm grid stability, and only then commit to steel refining infrastructure.
Advanced Steel Factory Strategies
Once your basic chain is running, advanced optimization focuses on reducing waste, improving routing efficiency, and scaling output without triggering grid failures. Community reports from the V0.1 beta suggest that the most successful players treat steel production as a continuous-flow system rather than a batch process, keeping every stage active at all times rather than cycling factories on and off.
Continuous Flow vs. Batch Processing
Continuous flow keeps your refinery running at a steady rate, fed by a constant stream of iron and supported by stable power. Batch processing, by contrast, runs the refinery at full capacity for short bursts, then idles it while stockpiles rebuild. Continuous flow is generally more efficient because it avoids the startup power spikes that accompany each batch cycle, but it requires more careful upstream balancing.
| Approach | Power Profile | Throughput | Complexity |
|---|---|---|---|
| Continuous Flow | Stable, predictable | Steady output | High upstream coordination |
| Batch Processing | Spiky, variable | Bursty output | Lower coordination, higher waste |
| Hybrid | Moderate variation | Good average | Medium complexity |
The hybrid approach appeals to many players because it allows some flexibility while avoiding the worst inefficiencies of pure batch processing. Whatever approach you choose, the key is consistency: a chain that runs steadily at 80 percent efficiency outperforms one that alternates between 100 percent and zero.
Scaling Without Crashing the Grid
Scaling steel production means adding more refineries, more iron extraction, and more power generation in a coordinated sequence. Players who add refineries first inevitably crash their grid, while players who add power first waste capacity on idle generation. The correct sequence mirrors the initial build order: power first, then inputs, then refining capacity.
Frequently Asked Questions
How do I start producing steel in Build and Conquer?
Begin by securing a steady iron ore supply, then build power generation capacity with at least 20 percent excess margin. Connect your steel refinery only after both inputs are stable, and route the output toward heavy builds or vehicle production. Community reports confirm this sequence minimizes early failures.
Why does my steel factory keep stalling?
The most common cause is insufficient grid output, not iron shortages. When total power draw exceeds generation, residential zones receive priority and industrial buildings like steel refineries lose power first. Check your grid margin before blaming your miners or transport routes.
How much storage should I build for steel production?
Build enough storage to absorb roughly two to three minutes of peak production output, which smooths out fluctuations in iron delivery and steel consumption. Overbuilding storage wastes resources, while underbuilding causes overflow that halts your refinery until space clears.
Does steel production require water?
Water network coverage is required for residential zones, but steel refining itself depends primarily on iron input and grid power. Keep residential water stable so your workforce remains productive, but do not confuse water requirements with steel factory inputs.
What changed about steel acquisition in the recent update?
Steel acquisition changed in a recent V0.1 beta update, and community footage from October 2026 shows that older chains may no longer function as expected. Re-check your production chain against the live build, and treat any numeric claims from outdated tutorials as unverified until confirmed.
The path to a reliable steel economy runs through disciplined sequencing, honest ratio balancing, and grid planning that treats power as a first-class constraint rather than an afterthought. This Build and Conquer steel factory guide has covered the full chain from iron extraction through refining to heavy build supply, with emphasis on the power demands that determine whether your factory runs or stalls. Master these fundamentals, and your war economy will have the refined metal it needs to field heavy vehicles and mechanized forces when it matters most.